Today I’ve been testing out Symbaloo – a social bookmarking site. I placed many of my favorite web 2.0 sites on it for you. Check it out HERE. Easily create a board of your favorite web links. Symbaloo will take those links and create mini icons for each one – visual + ease of use. Let me know what you think!
Month: October 2014
SlideShark is Sweet!
As an instructor at the university level, I often need to use presentations to guide my own lecture as I share information with my students. A presentation can help keep me on a straight path. I have battled how to view my own notes. I can’t write notes into the PowerPoint section because our projector system mirrors our podium computers so if they show on the computer, they will show on the projector. Of course, I could bring my own laptop and choose the projector as a secondary source that I could use for the presentation view, but I don’t like to do that either. I can print off notes – but I feel like carrying around a stack of papers and trying to give a quick glance down at my notes is tacky.
I’ve tried using my iPad for notes and using a clicker to change slides because I like to walk around the room. That’s just too much to hold and I fumble around trying to figure out which one I’m clicking. Then, I talked to GLEN and he shared with me SlideShark. Thanks, Glen!
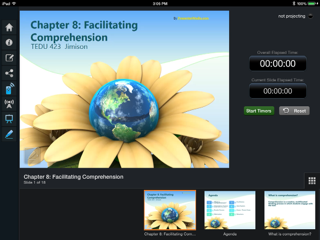
First, load your presentation, with notes, into the FREE SlideShark app. Next, click “broadcast” in the app and send the broadcast URL to your email. On the podium computer, pull up the email and open the link. The presentation will show to the class via the projector and you can control the slides from your iPad. The nicest thing? I can see my notes in the app while I control the presentation. It even has an annotation tool and laser pointer controlled through the app. I can easily walk around the room, talk, control the presentation, and see my notes without trying to hook up to the Apple TV. That’s right, Jessup instructors! It doesn’t matter which room you are in. You don’t need Apple TV!
Learn more by watching this quick video:
5 of the Best Annotation Tools!
Do your students turn electronic assignments as a PDF? If so – great! Annotating on a PDF is easy and a great way to offer formative and summative assessment. Why a PDF? PDFs are ideal for sharing documents across platforms. Not everyone may have Microsoft Word, but most Word documents can be saved as a PDF and opened by anyone with a free PDF reader. By using a PDF annotator, you can highlight, add notes, and write directly on documents. This is a great way for instructors to give feedback on work to students.
Example: I know many instructors offer feedback on Word documents by using the “tracking changes” feature or comment feature. This is helpful if the student uses Word. Some students don’t. Perhaps they use Google Docs? Feedback can be given using the comment feature or Kaienza, an app addition to Google Docs. What if students use Pages? You start to see the picture. Why not allow students to use the tool they are most familiar with then save and turn in as a PDF? All documents can then be given feedback using the same tool… a PDF annotator.
Here are a few of my favorite apps for PDF annotation:
PDF Expert by Readdle ($9.99)
This apps does cost $9.99 but it does just about everything. Users can add text, draw, highlight, change colors, add stamps, signatures, and type directly on the document. As a principal, I use to pull up an observation template in PDF Expert and fill it out while observing. I could then easily send it at the end of the observation by email. I often receive PDF forms that companies want me to fill out and return. Again, PDF Expert to the rescue! Here is a screenshot of a rubric that I have used. I am able to pull it up in PDF Expert, annotate, and save or send.
Watch this video about PDF Expert!
Skitch by Evernote (Free)
I’ve always been a fan of Evernote and Skitch. It’s a great way to mark up almost anything – photos or PDFs! Easily annotate and mark up…or use the cool stamps, circle, squares, or arrows. You don’t have as much capability for typing a lot of feedback but if you want something simple this could work for you. No iPad? No fear! Skitch is also available as a Chrome web extension. Yes!
PDF Pen by SmileOnMyMac, LCC ($14.99)
This is another great annotation tool but is limited to the iPad or Mac. Just like PDF Expert, it does just about everything. Add text, images, signature, draw, or highlight.
4. 
Notability by Ginger Labs ($2.99)
Again, limited to an app or Mac, yet a wonderful tool! I have written about Notability many times. What doesn’t it do? This does the same as the apps mentioned above, and adds one more element – audio. I do not believe the audio can be shared outside of the app, which is a drawback. I enjoy Notability because it is multi-use. I can use it to offer feedback through annotation. I can use it to record a seminar and write notes. I can use it to sign documents. It’s many tools all in one package!
5. Notable PDF Chrome Extension (Free)
I haven’t personally tried this one out, but it states that it also highlights, underlines, and allows for comments and text. It also states that you can use it offline and with any browser.
Let’s Up the Blogging
I think I’ve always liked to write. As a little girl, I had dreams of being an author.
I remember submitting a story I had written when I was around ten called “The Adventures of Becky Keele”. I’m pretty sure, looking back, that it was very similar to Tom Sawyer but my own girly version. I sent it to a few publishers and they all wrote back very sweet “no” letters and an encouragement to keep writing. I was heart-broken and decided I couldn’t be an author.
I have a friend who blogs and she is a very successful, professional blogger. She has tens of thousands of followers and she will commonly get 200-300 comments on each blog post. Why? She is controversial. She is honest. She speaks exactly how she feels. Exactly.
I’m not that brave. I take the safe route, usually, and try not to be controversial. I know that I represent a university and wouldn’t want a blog post to be taken the wrong way. But I do envy her, a bit, for the ability to be totally and completely naked open with her readers.
I do enjoy blogging. And – I feel that it is a great educational tool. I really wish more university instructors would think about consider assigning blogs for classroom assignments instead of just essays. Blogs provide excellent opportunities for students to be able to reflect on content and share their thoughts and content knowledge reflections with the world.
“According to educational specialists Drs. Fernette and Brock Eide, the use of blogs in an educational setting produces several benefits. These benefits include the promotion of critical and analytical thinking, increased access and exposure to quality content and a combination of solitary and social interactions with peers. The educational benefits of blogging can also extend to the administrative and teaching aspects of how a class operates.” Read more here! Lou Martin, Demand Media
My Tech for Teachers course recently discussed assessment and the importance of student reflection. How often to you reflect, or think about, what you’ve learned? I do…all the time. Why not have students reflect on their reading or class content sessions? Students will benefit from the ability to reflect, and instructors will benefit from reading their reflections.
Student voice is important and not all students speak up in a classroom. Blogging allows students to share their opinion and gives those with differing learning styles a chance to “speak” up. I believe it also improves writing skills. When students know their information will be shared in a public venue, they will be more apt to edit and rewrite for voice and accuracy.
At William Jessup University, we are a Google Apps school and have easy access to Google sites. Simply go to mail, click the Google App icon  and choose Google Sites. A site can be created in a matter of seconds. I enjoy Google sites because it is easy to set up, free, and has privacy settings. However, if I am being totally honest, it is not the most visually appealing. I use WordPress to type this blog. Decide your own purpose, review the tools yourself, and decide what will work the best for you!
Google Sites (privacy controls)
WordPress (basic blogging)
Edublogs (for education)
Tumblr (pictures)
Postach.io (I used this while traveling.)
Squarespace (visually appealing)
Postagon (for the minimalist)
Ghost (split screen editor – sweet!)
Svbtle (designed to help you think)
Medium (collaborative)


