Traveling with Tech!

Summers…
Full of family and traveling. I find myself in the midst of a big adventure traveling to the far off island of Ilha de Mozambique off the coast of Africa. My husband and I will be helping some friends of ours who are missionaries on the island. We may or may not have Internet access so how do I prepare for this and what do I use for technology?

Today is a work day yet I find myself in a hotel room trying to work before we leave tonight. The Internet service is already limited so I am posting this blog through email! After messing around with my app for an hour, I gave up and found out that I could post by emailing my blog! This gives me time to type up what I want to say and when I get to a place of Internet access, I can press send. I like easy! (I apologize in advance if my pictures do not post. I really have no idea how this will turn out.)

We also have a blog, separate from this one, for our friends. It is located at http://jimison2moz.postach.io. . Postach.io is a great web site that uses Evernote as the sync tool. I simply type my note in Evernote and tag it with the word #published. It automatically publishes it to the website! Since I am typing this blog in an email, I can also send it directly to Evernote using my Evernote email address and I will get 2 blogs done at once. Again, easy!

The first thing I did was add my main cities to the iPhone world clock.

I will also use my iPhone for my camera and alarm clock. I double checked with my phone service and found out that if I turn my phone to airplane mode I will not accidentally hook to cell service overseas. I don’t want an extra bill!

We used an app called Waze last night to get to the hotel.

Waze is awesomeness! Not only does it give directions, but it alerts you to traffic, police, hazards, etc. If there is a lot of traffic it will re-route you to avoid it. It works off of social media with other Wazers that report current conditions. You can see from my screenshot that a lot of people were using the app just in this area!

I have my boarding passes and travel information on my United and South Africa apps. I also posted all my travel information in Evernote with all my confirmation emails.

When I go overseas I am sure to bring my echo pen. They have newer style pens that are wireless, but my echo works fine!

The echo pen records audio. My pen does not need wifi so it is great for traveling when I won’t have any. I like to record the nationals speaking in their language. I use it to write the words and listen so that I can learn the language. When I tap the word, it replays it for me. I used this years ago in Ethiopia and can return to it even now to learn the language again. It is light weight and easy to carry in my backpack.

For the airplane I will also use my kindle. I do carry books as well. But the kindle is nice for books I have purchased online.

The only other thing I may use overseas is Skype or Hangout if I am able to connect to wifi. That way I can check in with my kids and see how they are doing.

That’s about! I’m looking forward to being unplugged … or at least less-plugged… for the next few weeks!
On Marathons and Fog.

Just to warn my technology followers…this has nothing to do with technology! Today I am sharing from my daughter’s blog. She ran her first marathon this weekend and I am sharing this blog with my many followers that always ask how she is doing! Thanks for indulging a happy mama.

Bliss + Simplicity

I have been excited to write this blog for a long time. Processing through my first marathon is exciting, tiring, full of dreaming.

I joined ASICS Mammoth Track Club a year ago. Feeling like God wanted me to run full-time was a leap of faith at first, and now, in hindsight, I see His intricate way of revealing His plans. He has walked with me every step, showing me that when I say “yes” to Him, He will faithfully carry out all He has for me.

I’ve known that the marathon would be the distance I wanted to pursue for a long time. However, I never expected to race a marathon so young. At 23 years old, I feel so thrilled and excited to start my marathon career.

I picked Grandma’s Marathon in Duluth, Minnesota, as my first marathon for many reasons. Firstly, I felt like it was the marathon that…

View original post 940 more words

Would You Boogie for Productivity?

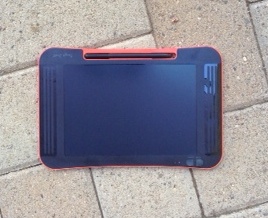
Yesterday our new “Boogie Board Sync 9.7” arrived. I’m testing it out to see how it would work for faculty and staff as a classroom and productivity tool. As promoted on the Boogie Board website: “Now you can digitally create page after page of notes and drawings without sacrificing the writing experience. The Boogie Board Sync 9.7 saves your images and wirelessly transfers to your phone, tablet, or computer via Bluetooth.” Share with Evernote, email, and social media with the Sync desktop and mobile applications. The part that intrigued me about the Boogie Board was its ability to display images in real-time on a PC monitor or projector.

Here is a picture of my new Boogie Board:

photo 2 (5)

My thoughts so far:

PRO

  • It is very EASY to use. There is a simple on/off switch and save and erase buttons.
  • The wireless sync works.
  • The desktop app and mobile app are both very easy to use.
  • It is thin and light weight!
  • It genuinely feels like writing! I have used many stylus tools and this board has a nice “feel” to it. I love the fact that I can rest my wrist down and it does not leave a mark!
  • It syncs easily to Evernote, social media, and email.
  • Software is free
  • Price! This currently sells for $82.97 on Amazon! WOW!
  • Works as a mouse using the digitizer tool.

CON:

  • The screen is dark – but works fine for me. Some individuals may have a hard time with the dark screen.
  • There is NO erase button. This is the hardest thing for me. I tend to like “neat” notes and when I make mistakes, I like to erase and write again. You can’t do that. All you can do is scratch out or erase the whole thing and start over.
  • In order to use the live virtual whiteboard feature, you have to run the Sync software with Bluetooth for wireless use. It is free, so that can go up in the Pro section! Our classroom computers do not have Bluetooth, but a Bluetooth Dongle can be purchased for around $15 that would work. OR, if you have an iPad, use the Sync app on the iPad and project it to the class through the Apple TV.

Improvements I’d like to see:

  • Light screen toggle option
  • Erasing
  • The ability to pull up a document (PDF) in order to write on it.
  • Saving to Google Drive

Overall, I am very satisfied with it. It is comfortable, thin, light, easy to use, and affordable!

photo 1 (7)Thin yet durable!  Very light weight.

photo 3 (1)Picture of mobile application. Once you write, you can share it by dragging the middle button to how you want to share using”Drag to Share”. I shared via email and it opened up my email program nicely!

photo 4 (1)

It will even show my drawings in real-time using the mobile draw tool.

photo


Digital Storytelling Workshop

We finished three awesome workshop days learning about Digital Storytelling. I must say – it was my favorite workshop to date! We had a mixture of staff and faculty. They learned about the 7 Steps of Digital Storytelling created by Joe Lambert from the Center for Digital Storytelling. I experienced Digital Storytelling through a 6 week webinar series and was excited to share what I learned with others. It’s an emotional process – telling a personal narrative.  For me, it was especially hard.  I had to re-write my story a zillion times because I had such a hard time trying to find my true emotion with the story – the “why” behind the story and “why” I wanted to tell it. But, I finally did and enjoyed working through the process.

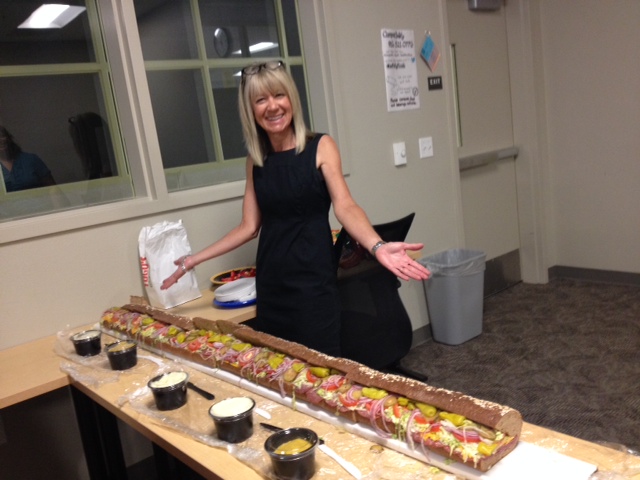
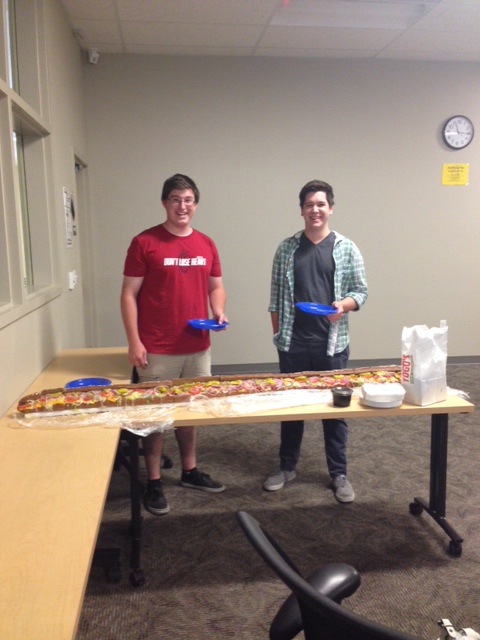
We spent day one learning about the 7 steps, writing a small 6 minute story, and working in a story circle. The participants wrote their personal narrative draft for homework.  The best part of day one?  The food! I ordered a 6 foot long sub from Togo’s. It was fun watching it being delivered. It took 2 of our student workers just to get it to our room!

Totally cool 6 foot long yumminess

Totally cool 6 foot long yumminess

They are ready for the first bite!

They are ready for the first bite!

Days 2 and 3 we worked in the lab. We spent time giving feedback on stories through story circles. I know that the participants enjoyed the time of collaboration. It was awesome watching individuals from different departments on campus joining together and collaborating.

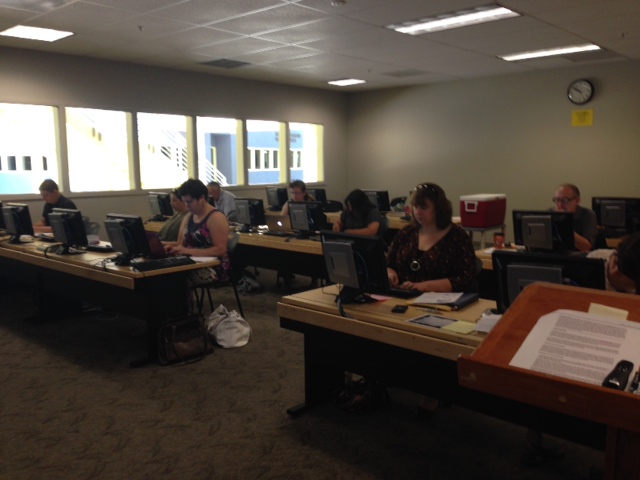
The last part of our time was learning the technology. We used WeVideo for our story creations. My goal was for participants to focus on the story rather than the technology and I believe we were successful with this. Our lab came in handy for the technical work:

photo (31)


Participants learned about the importance of media selection (visual, voice, and music) and where to access resources. We discussed creating our own media VS choosing media available online.

Our workshop was so successful I decided to offer it again at the end of the summer. There is so much value in telling a story – whether personal, scholarly, content-related, historical, and so on and so on. There are many different ways that digital storytelling can be used in higher education. Here are a few links that I found useful:

UW-River Falls Digital Storytelling (University of Washington)

Hung: PBL & digital storytelling research

Barrett: Digital storytelling research

Digital Storytelling – UC Boulder

Digital Storytelling @UMBC

Digital Storytelling in Higher Education

Powerful Technology Tool for 21st Century

Digital Storytelling for Engaged Student Learning (for a price or check library)

Evaluating the Effectiveness for Student Reflection

 Click below to register for our August session or view a few of our videos created during the workshop:  (WJU Faculty and Staff may register for training only. Sorry!)

See on Tackk.com 

Design Thinking Workshop

Today we held our first Design Thinking Workshop. It was virtual…yet interactive!  Why did I decide to do this? I was researching ways to improve innovation and creativity skills and ran across Stanford’s d.school. I knew I couldn’t afford the full design thinking course but saw that d.school provided a “crash course” through video, handouts, along with our own facilitation! Perfect!

In our 90 minute session, our attendees were able to go through the full design thinking process by participating in the Gift Giving Project.  By working in pairs, participants gained empathy for their partner, defined a problem, ideated solutions, built a prototype, and shared in feedback. It was fun and entertaining.

photo 4 (1)

photo 3 (1)

photo 2 (4)

I enjoyed watching the  collaboration among the staff and faculty as well as listening to their conversations that included great questioning skills. I believe that they came away with a new way to work through a problem, think outside the box, and create new friends!

Check out the Virtual Crash Course in Design Thinking!

4 Must-Have Tools for CREATING

We recently held a digital storytelling workshop. It was amazing! I will be sharing our digital stories very soon!

Let’s face it. Most of us like stories. Everyone has a story to tell and there are so many ways to tell a story. Sometimes it’s fun to imagine a story in your head. I guess that’s why it’s often difficult to put a good book down!

We also know its important to have students be innovative and creative.

Adobe_Creativity_and_Education_Why_It_Matters_infographic  82% of college educated professional surveyed by Adobe wish they had more exposure to creative thinking as students.  I could include myself in this mix. Creativity comes from the word create. So why not have students CREATE to demonstrate their understanding?  Through a mix of visuals and audio, students can easily create and share what they know.

I have 4 tools that I love to use. They are all easy and each offer a way to easily create a visual “web event” with a mix of words or even audio. Instructors can use any of these tools to introduce content to their students with a lively mix of visual, text, and audio. While I realize there are many tools out there, these are really my favorites! (not in any particular order)

1. Cowbird

I like the fact that Cowbird is simple. With it, you choose ONE visual element and add text and audio. I like that the visual is large and the “play” button for the audio is obvious. It is easy to use but there were a couple things to note. The arrows at the top left bring you to the next page – the text.  This is not as obvious to me and I feel that if people don’t understand to click it, they might miss your written content. The third page contains stories with similar tags. As an educator, I’m not really a fan of this because I don’t get to choose that content. Click below for my Cowbird that was prepared to share our upcoming mission trip:

Screen Shot 2014-06-10 at 3.20.33 PM

You can get a “feel” for Cowbird. It allows you to mix a picture with audio and text. When you click the sample above, you will be able to click to hear the audio, then click the arrows at the top to read the text. Please note that Cowbird does not allow you to create your audio within the program. I recorded my audio using my iPhone voice memo and it worked just fine. I just recorded the audio and emailed it to myself, then uploaded it to Cowbird. (Listen carefully and you will hear our porch wind chimes!) You will see that the second page has our text and the third page has stories that I did not choose. Perhaps if you do NOT tag your stories, there will not be any stories on the third page. I tagged mine with Mozambique. (PS on a personal note…we have 2 weeks left to raise our support. If you want to support our trip, read through page two.)

2. Tackk

I have written about Tackk before and it is probably my favorite – along with S’More. Click here to watch the demo video. I use Tackk to create visually appealing discussion board posts on Moodle. I simply create a Tackk and embed it into our discussion forum. I believe that it grabs the attention more than just putting a picture with text. They have a great tool within the product to search out amazing photos. Here is an assignment that is in a discussion forum – that is an assignment for a Tackk!

Screen Shot 2014-06-11 at 8.34.03 AM

I also use Tackk to introduce training sessions. Here is a Tackk I created to promote our upcoming training session on Design Thinking (sorry, open to William Jessup University staff and faculty only):

See on Tackk.com 

Since Tackk supports links, I was able to create ways for faculty and staff to RSVP for the training within Tackk using Google forms. A Tackk can be easily shared through social media, embedding (but not in WordPress), email or print.  Update!  Tackk is just simply awesome. They saw my Twitter link for this article and gave me tech support for embedding into WordPress. It works! AND they are quick with the support! Yes, I can’t say enough about Tackk!

3. S’More 

I’ve written about S’More many times as well because it is a great tool!  I used S’More to create my training email.Screen Shot 2014-06-11 at 8.37.36 AM

Over 8,000 views! S’More tracks visitor clicks and RSVPs. Like Tackk, you can share the S’More via embedding, social media, email and print.  S’More allows for a few more options because you can add all of these to a S’More:

Screen Shot 2014-06-11 at 11.08.28 AM

4.  Adobe Voice

Simplicity is sweet. Adobe Voice is an iPad app and so easy to use. Simply add pictures and press your finger down to record the voice. It will automatically add music and formatting. I’ve used Adobe Voice to create some simple training videos introducing viewers to Moodle. Click the link above and you can see some great examples of stories created using Adobe Voice.

Ideas:

English:  creative writing exercise, choose a novel and give a summary or critique, choose a picture and write from a particular point of view

History:  choose a map and write a historical account, report on a particular time period or event

Art:  describe your thoughts regarding an artifact, research an artist

Bible: write about a biblical perspective concerning an event or picture…current or past

Science:   choose a picture in nature and describe what makes it interesting from a scientific standpoint

There are tons of ideas. Allow students the opportunity to create a visually appealing web event. I bet you’ll be astounded at their creativity!


Be Striking with Strikingly

I needed to get the word out there…

I wanted it to be visual, informative, easy.

My answer:  Strikingly!

Just recently my husband and I decided to go on a short term mission trip to help some friends with construction and service in northern Mozambique. They live on Ilha de Mocambique – Mozambique Island. I wanted a way to share this information with friends to ask for prayer and support. I wanted something quick to use, easy, visually pleasing, and basic.

Screen Shot 2014-06-06 at 1.19.14 PM

Strikingly has been the perfect solution. Touted as the “best website builder for the mobile age”, a user can create a basic yet strikingly beautiful web site with no coding or design experience. The web site has easy-to-use templates for events, portfolios, fun, business, personal, and start-ups.

How do I see this working with education?  Many ways! Instructors can introduce their content through a visually appealing web site. They can provide outside links to other content sources, pictures, maps, etc. There is a feedback form and the possibilities of using it are many. Students can easily create a site demonstrating their content knowledge, reflection, journal entries, creative writing…you name it!

Strikingly is free.  I invite you to give it a try!

I’d love for you to visit the site I created and learn more about our upcoming trip. Visit our site at:

http://jimisontomoz.strikingly.com/

Screen Shot 2014-06-06 at 2.04.44 PM

Traditional VS Online: A Student View

photo 1 (4)

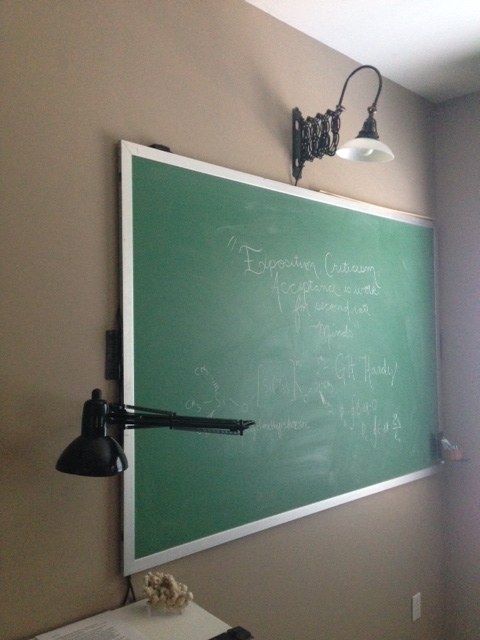
I decided to have a conversation with my son because we think quite differently when it comes to technology. He enjoys a very traditional education. He is 21, a college student, and studying high energy physics. He is very serious about his studies and spends about 80% of his day-time hours studying and writing on his chalk board. He only uses his computer for watching TED videos or typing papers. Other than that, he prefers not to use technology. He rarely uses his phone and doesn’t text.

photo (26)

As an educational technologist, we think quite differently. And, I value his opinions. He is a current college student and I know there are many college students that share his feelings regarding education.  As someone who believes in traditional, hybrid, and online education, I wanted to find out what he wants from his professors and education.

What do you want from a professor?  Brett listed three things – quite quickly, I might add:

  1. I want someone who is organized.
  2. I want to be challenged.
  3. I want someone who takes teaching seriously. I want the person to be professional.

I wanted to find out why he feels so strongly about having a traditional education rather than an online education.  This summer, he will be taking his first online course and I know it isn’t by choice. It is the course he needs, and is only offered as an online class.

I realized after talking to him, that many of his concerns are because of HOW he learns. He is a kinesthetic learner and learns best by doing. He also enjoys dialogue and enjoys taking part in classroom discussions.

Here are his thoughts regarding taking an online class:

“When you learn from a computer, it is not hands-on. If you are a visual learner and can stare at screen to learn, it will work for you. If you are a kinesthetic learner, it helps to be able to talk to drive to the school, take part physically in class, and talk to people while you are learning. When you go to a classroom, you are immersed in a learning environment. But on a computer, sitting at Starbucks, there are more distractions. It’s hard if you can’t control yourself to stay focused on a screen.”

I asked him what he feared most about beginning his first online course. “You are on your own, basically. If the subject seems hard, it’s tough-luck. It helps for me to be able to sit down in class and ask questions. Often times the questions steer the lecture because the professor can adjust and give feedback. If everyone asks the same questions, the instructor teaches it another way.”

Brett likes to be challenged and although he wonders about times when he might not understand, he also thinks he won’t learn much. “Online courses have to be dumbed-down to be prepared for students who can’t ask questions a lot. They are too generalized in order to appeal to the masses.” He thinks he won’t be challenged in an online class.

Hmmm… so what can I learn from this student perspective? As I pull back and read it over, I can conclude a few things that must be considered when creating an online course (or any course, for that matter):

  1. Know your learners.  This is a very general statement and can be taken many ways. We need to know the learning styles of those coming into our course and make sure that the content is being delivered in a variety of ways.  We also need to connect with the students. We need to get to know them personally!
  2. Students want a challenge.  Most of us enjoy accomplishing a task that was challenging – whether putting a puzzle together, finishing a long run, or completing a challenging assignment. It shouldn’t be so challenging that the task cannot be completed to the best of someone’s ability – but it should not be so easy that it is simply a piece of cake (short lived and no  benefits): (Please ignore the fact that it may taste great!)1280px-Strawberry_Cake
  3. Help your students feel immersed in a learning environment. I know this is difficult with an online course, but it can be done. Make sure there is a “social” area where students can get to know each other. Take advantage of chats or synchronous class time including video. 
  4. Be available. As an instructor, be present in the “classroom” and make sure students know you are available. Try to be available through video-conferencing because it will help students understand that you are a real person, too. Skype and Hangout are easy tools to connect to students. For an online course, create a video introducing yourself. Students will appreciate seeing your face and hearing your voice!
  5. Make sure there is a forum for questions.  Set up a discussion forum where students can ask questions regarding homework or content. They may be able to help each other. As an instructor, give input as well – even if it is a question to help the students come up with the answers.
  6. Be organized. One fear Brett has is going into the course and not knowing what to do. He stated that he hopes he will enter the online course and that it will be “evident to someone who has never had an online course to know what to do.” Brett is organized and he is hoping that his online course will not only be well-organized, he is hoping that it will be evident how it is organized. Take a look at the online course through the eyes of someone who is unfamiliar with taking an online course. Is it simple to use? Is there a structure? Are there directions? How about creating a webcast?

Finally, I asked him if there was anything that he does like having online, even in a traditional classroom. He said there was.  He likes having access to:

  • “a rigid outline” including dates when assignments are due
  • syllabus
  • an “overall layout to see the whole plan in advance”
  • grades (He said they have to be easily accessible and up-to-date.)

I plan on writing a follow-up blog after Brett takes his online course. I’ll interview him again and hopefully it will be a positive learning experience for him! We shall see!