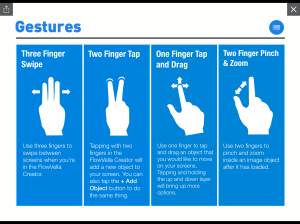
Flow Through Your Presentation with Flowvella

I get so excited when I use an app that works with our LMS!  I used Flowboard in the past in a very limited capacity. It is now Flowvella – and wow – they upped their features! Love it!

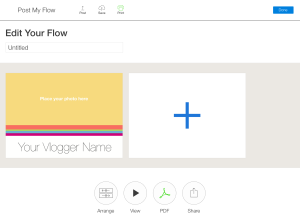
Flowvella allows a user to create an interactive presentation by adding navigation, videos, PDFs, and image galleries. Screen Shot 2015-03-11 at 3.41.03 PM
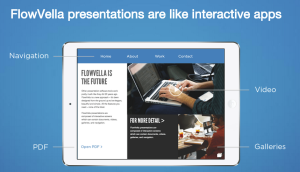
The presentations are then stored in the cloud and are available to your audience to view, comment, or share. If you wish, you may even password protect your presentation.

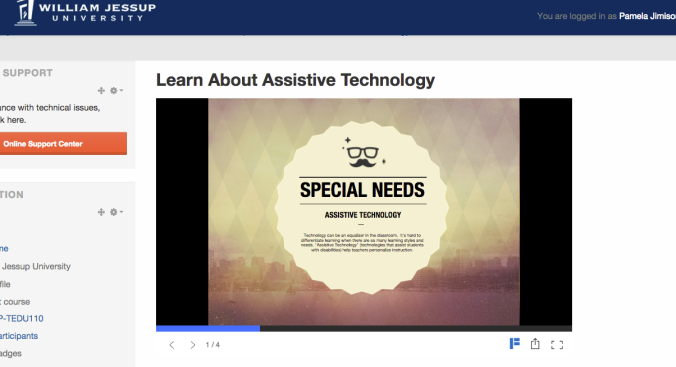
Recently, I created a Flowvella for my course and added various YouTube videos I wanted the students to view. I was able to easily upload it to their cloud service, then I received an embed code which I used to embed into our course on Moodle:

Screen Shot 2015-03-11 at 3.47.30 PM

Students may view the presentation as shown or full screen. The videos are embedded right into the presentation. Sweet!

With Flowvella Education (the $4.99 version for educators), you can:

CREATE AND CUSTOMIZE
• Add transitions to your web links
• Add and arrange objects on your screens
• Add photos and videos
• Pinch, zoom and crop your photos
• Send your objects forward and backward
• Add links to screens or to the web
• Add photo galleries

SHARE, VIEW AND PRESENT
• Export to PDF, print via AirPrint
• Present straight from your iPad, connect to a projector, or use AirPlay
• Flows work OFFLINE and are SAFE without an Internet connection
• Share your presentations with anyone via URL or PDF
• Share via Facebook, Twitter, email, or copy the Flow URL and paste anywhere

I am a fan of anything that makes the content visually appealing and easy to use for the teacher and students. Flowvella has my vote!
IMG_0214 IMG_0215 IMG_0216

ThingLink Interactive – Revisited

Today I decided to revisit ThingLink. I wrote about it last year and enjoy the tool. However, I must admit that I haven’t used it in about a year as well! I received an email yesterday offering to me a free educator’s account which caused me to take a look again. “I’d like to invite you transition to our Free Education account that will allow you to easily register and manage up to 100 students and 1 classroom, and ensure they browse with safe and secure content for students. All you have to do is sign in to ThingLink and click the button below and your account will automatically gain educator status.” I’m glad I did! I can easily manage up to 100 students by sending them an access code.

If you aren’t familiar with ThingLink, it is “the leading platform for creating interactive images and videos for web, social, advertising, and educational channels. Be creative! Make your images come alive with video, text, images, shops, music and more! Every image contains a story and ThingLink helps you tell your stories.”

Simply choose a picture, click anywhere, and add a video, image, audio, or text.

This is the end result – click the image to go to ThingLink!

Hover over the image and click on any icon to open up a new source. Imagine what you could do with this in the classroom!  I could list a bunch of ways, but others have already done the thinking for me:

65 Ways to Use ThingLink in the Classroom 

73 Ways to Use ThingLink

Tutorials by ThingLink: Use Your Own Classroom Channel

One Image, Tons of Possibilities

EdTech Update

The State Educational Technology Director’s Association (SETDA) recently created a new website called EdTech Update and the name says it all – it keeps you informed and updated on all the latest EdTech articles and trends. The site features content from Steve Anderson, Scott McLeod, Digital Learning Now, and WJU EdTech! Yes, I am excited to participate in this association of EdTech blogs.

Check it out here: (And in the future, just click the icon to the right!)

EdTech Update

How to Study Effectively

I recently found this infographic from Indiana Jen’s post (original source Open Colleges). Thanks for sharing the infographic! Our finals are just about finished – but a great resource none-the-less.  By the way, I just won a year’s PRO subscription to Piktochart. I love using Piktochart for creating infographics. They offer amazing , easy to use templates and tools. How did I win? With a ridiculous Movember picture. Yes, if you are brave enough you may click the link. I’m glad being silly actually can win you something. (smile)


How to be Effective when Studying – Best Study Apps, Tools, Tips & Techniques by Open Colleges

Digital Storytelling Workshop

We finished three awesome workshop days learning about Digital Storytelling. I must say – it was my favorite workshop to date! We had a mixture of staff and faculty. They learned about the 7 Steps of Digital Storytelling created by Joe Lambert from the Center for Digital Storytelling. I experienced Digital Storytelling through a 6 week webinar series and was excited to share what I learned with others. It’s an emotional process – telling a personal narrative.  For me, it was especially hard.  I had to re-write my story a zillion times because I had such a hard time trying to find my true emotion with the story – the “why” behind the story and “why” I wanted to tell it. But, I finally did and enjoyed working through the process.

We spent day one learning about the 7 steps, writing a small 6 minute story, and working in a story circle. The participants wrote their personal narrative draft for homework.  The best part of day one?  The food! I ordered a 6 foot long sub from Togo’s. It was fun watching it being delivered. It took 2 of our student workers just to get it to our room!

Totally cool 6 foot long yumminess

Totally cool 6 foot long yumminess

They are ready for the first bite!

They are ready for the first bite!

Days 2 and 3 we worked in the lab. We spent time giving feedback on stories through story circles. I know that the participants enjoyed the time of collaboration. It was awesome watching individuals from different departments on campus joining together and collaborating.

The last part of our time was learning the technology. We used WeVideo for our story creations. My goal was for participants to focus on the story rather than the technology and I believe we were successful with this. Our lab came in handy for the technical work:

photo (31)


Participants learned about the importance of media selection (visual, voice, and music) and where to access resources. We discussed creating our own media VS choosing media available online.

Our workshop was so successful I decided to offer it again at the end of the summer. There is so much value in telling a story – whether personal, scholarly, content-related, historical, and so on and so on. There are many different ways that digital storytelling can be used in higher education. Here are a few links that I found useful:

UW-River Falls Digital Storytelling (University of Washington)

Hung: PBL & digital storytelling research

Barrett: Digital storytelling research

Digital Storytelling – UC Boulder

Digital Storytelling @UMBC

Digital Storytelling in Higher Education

Powerful Technology Tool for 21st Century

Digital Storytelling for Engaged Student Learning (for a price or check library)

Evaluating the Effectiveness for Student Reflection

 Click below to register for our August session or view a few of our videos created during the workshop:  (WJU Faculty and Staff may register for training only. Sorry!)

See on Tackk.com 

From Paper to Digital Using Whitelines Link!

I am enjoying a FREE app today – Whitelines Link.

Whitelines Link in iTunes

Whitelines Link in iTunes

I have found that many people enjoy writing using paper and pencil. I have written about the Livescribe Echo Smartpen (which I love) but purchasing the pen can be expensive. The Echo Smartpen still is first choice because it captures words and sound. However, Whitelines  is a wonderful alternative for those that want to capture words or drawings only (including color!).

The free Whitelines Link app works with Whitelines paper. The paper is FREE if you print your own…or you can purchase a notebook. I like the app so much, I may end up purchasing my own notebook! According to Whitelines, “Whitelines® is the new generation of writing paper. The concept is patented and yet very simple: Since markings from pens are dark they interfere with the traditional dark lines of ordinary paper. On Whitelines there is no visual interference between the lines and the pen colour. Whitelines makes your writing and drawings stand out.” Not only is your writing transferred to a digital image, the paper is gentler on the eyes!

First, I printed out a piece of paper from the Whitelines website and took notes using a regular pen:

notes on paper

Next, I downloaded the app from iTunes on my iPhone 5:

whitelinesapp

Then, I used the app to take a snapshot of my notes. They were downloaded and I sent to my Evernote account and email. Here is the result!

pdfofwhitelines

The page saves as a .pdf. Here is a link to the .pdf: Sample of Whitelines! You can see that the paper lines disappear on the digital image and all that remains are my notes! What a great product. Give it a try! How would you use this?

Whitelines Link from Whitelines Paper on Vimeo.